
Posts by John Hanna
Design Studio: The seam as a pattern
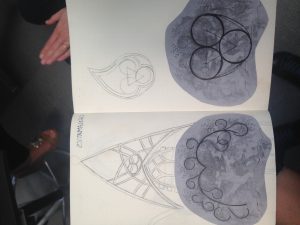
Project member Peter Koorstra, together with his students of the Form and Modelling design studio are working on understanding the seam as pattern. The student work aims at coming up with innovative solutions to replace damaged architectural heritage. It looks into the possibilities of combining different 3D printed panels to replace the vault at the Hippolytuskerk. The design studio highlights the issues of seams, and how can the seams be incorporated in the new designs.

Visit to the Cultural Heritage Agency of the Netherlands (RCE)
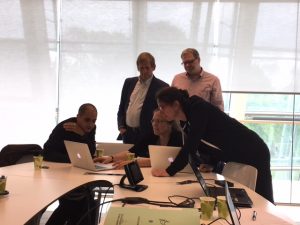
On the 9th of May, project members: Carola Hein, Angela Dellebeke and John Hanna visited the Heritage Agency of the Netherlands in Amersfoort.
In addition to collecting archival material of the church’s history and previous restorations,the project team discussed the updates and intended outcomes of the Hippolytuskerk project during their meeting with RCE experts and specialists from the domains of architectural heritage and paintings restoration.
Possibilities for producing the coloured surface of the vault in the Hippolytuskerk
On the 24th of April, 2017 proposals were made for the surface of the 3D printed structure:
- To add a thin 3D printed layer with microstructures, and final colours (maximum curvature/thickness of 5 cm) – which is added on a flat surface of a solid 3D structure, to reduce the costs.
- Alternatively, the thin 3D printed surface, can be added to a spider-like structure, instead of a solid structure. This kind of structure could in future also be used in architectural heritage to fill e.g. holes, or missing parts as an alternative to Styrofoam, as illustrated in the image below.
- To print a coloured 3D model. However, the colour will have a plastic looking nature, as the technology does not provide an inkjet quality yet.
- To print the final colors and textures on a thin foil layer (50 microns) and fix it over the solid 3D structure, which in this case will have all the microstructures, and grains. The foil should be flexible and soft enough to stretch over the 3D structure.
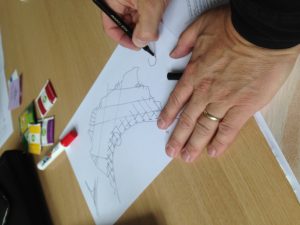
First Test Prints
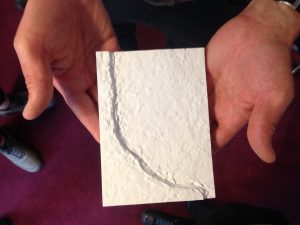
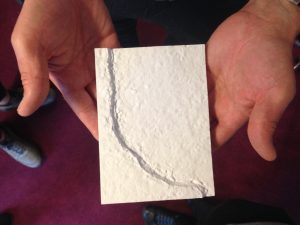
First test prints of the section under study have been produced at the CAMlab of TU Delft. A modified section was produced at a reduced scale (15x20cm) to study the form and appearance of the structural crack, currently present at the walls of the Hippolytuskerk, Middelstum.
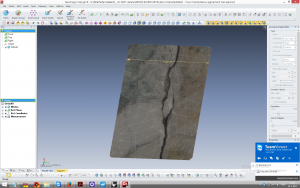
Conversion of virtual models into printable files
In the following weeks, a portion of about 65×35 cm was made in high resolution, to test the formats with the 3D printer. A sliced portion of 15×15 cm high resolution were late made to generate the g-code and make sure that the prints could be eventually produced.
It was advised that:
Accordingly, the mesh was optimized in Geomagic. A reamining issue was to get the precise number of the measurement due to zoom issues in Geomagic and the rough corner to put the trim point.
– In this mesh processing, Geomagic design 5.1.0.0 was used. In this case, Geomagic design has no option to export to ZPR format.
The available formats are .xtl, .obj, .3ds, .wrl (VRML 1.0 file and VRML 97 File), .ptc, .pts, .ply, .asc, .dxf, .icf, .xdl, .mdl)
– It was agreed that for the workshop in future, a reduced number of triangle will be provided. But for the test prints (15×20), the scanning team prefered to deliver a higher quality to show the depth of the crack.
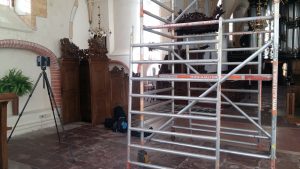
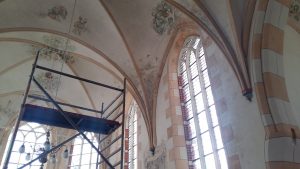
3D Scans of the Threatened Structure
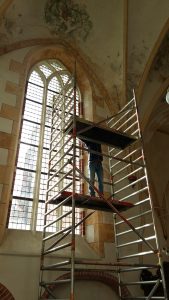
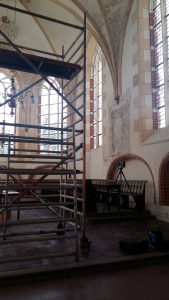
On Tuesday, 21st of February, project members Valentin vanhecke and Miktha Farid conducted the first scans of the Church in Middelstum. As it was practically impossible to reach the required height with the scaffolds, the project members carried out the required scans with the laserscanner from as close as possible, with a resolution of around 0.5 mm and with the highest quality available. Many pictures were captured in order to provide the best possible colours. 3D virtual models were developed through combining photogrammetry with laser scanning.

Recent Comments